If you love consuming coffee every morning to perk your day, then this is your treat. There is nothing that will make you so excited to wake up than knowing you’ll be having your home made coffee for breakfast. Roasting your own coffee has a lot of benefits to you.

Pros of roasting coffee beans at home:
- You have the chance to try as many flavors of coffee as you want. No limit.
- Your coffee will be freshly made with a freshroast rather than a roast that has overstayed on the supermarket shelf.
- The coffee beans roast will be done to your preference as you are in control of the roast process.
- Roasting your coffee will definitely save you money as you only need to purchase green beans from local coffee shops.
- Coffee roasted at home has no preservatives.
- Roasting coffee at home equips you with a new experience and skill that is impressive. It comes with a lot of satisfaction. You will perfect roasting after a few attempts with various amounts or batches of beans.
- Another advantage is that you will only roast the batch you need at a time.
Once you learn how to roast your coffee beans you will definitely make it your routine. When roasting coffee beans at home, you’re guaranteed of making fresh coffee.
Home roasting is easier than you think. All you need is some practice on how to roast the beans according to your preferred taste.
Although you can buy roasted beans from a local roaster or coffee shop, you can’t tell how long they’ve stayed on their shelf. Thus, buying roasted beans may not brew the best coffee. Instead, roast whole beans at home for fresh-tasting brews. Also, coffee beans roasting at home will allow you to undertake the entire roasting and coffee-making process according to your preferences.
To properly roast coffee beans from the comfort of your home, you’ll require a supply of whole coffee beans and a few, simple tools. It’ll also help to understand how to roast the beans and how the level of coffee bean roasts can affect the flavor of your brew. Read on through this article for more tips on how to roast your own coffee beans.
What Are Coffee Beans And Why Are They Roasted?
Coffee can be described as small red cherries when ripe. The cherries undergo several processes before reaching your favorite cup of coffee.
The first process involves harvesting. Once harvested, the cherries are processed by passing them through a pulping machine to get rid of the exterior skin, a middle pulp, and the inner parchment. Once these skins are removed, an inner seed is revealed, which is referred to as a coffee bean.
Next, the coffee beans are dried. Their color changes to green once dry. Dried coffee beans are shipped to roasters for roasting.
Dried coffee beans have an extensive shelf life. They remain fresh for some time once roasted. However, if you brew coffee from coffee beans that aren’t roasted, you’ll get a very acidic and bitter brew that’s almost undrinkable. The purpose of roasting the beans is to give coffee its distinctive aromas and flavors.
What Does Coffee Roasting Entail?
Roasting coffee beans is a science involving several types of reactions. It is a chemical process known as roast development, which involves a lot of chemistry. Green coffee beans undergo drastic changes to their compounds during the entire roasting process. By roasting green bean coffee with a coffee roasting machine, you’re forcing moisture out of them, thereby making them expand and dry.
When roasting, some sugars undergo conversion into carbon dioxide (CO2) gas. Other sugars are converted into complex coffee flavors for enhanced coffee sweetness. When fully roasted, green coffee beans turn brown. Fully roasted beans are about 18 percent lighter and up to 100 percent larger. Upon roasting, the beans start degassing and lose much of their aroma and flavor within 1 to 2 weeks.
The Levels Involved in Roasting Coffee Beans

Professional roasters have established 10 standard levels of roasting coffee beans. However, you’re not restricted to reaching all the levels. The levels you’ll reach depends on your preferences. The standard roasting levels and their characteristics include:
- Green – At this level, the beans retain their green color despite starting to heat up.
- Yellow – At this level, the beans become yellowish. Also, they start emitting a grassy smell.
- Steam – By now, steam starts rising from the coffee beans. The steam results from the water evaporating from the beans. Steam stops evaporating once they reach the drying stage as no more water escapes.
- Cinnamon Roast (First Crack) – It is the starting point of real roasting. Sugars in the beans start caramelizing in a process known as caramelization. You’ll hear the first cracking sound. By now, you’ll be working with brown beans, which is a major difference in color when compared to green beans.
- City Roast – After the initial crack, roasting will reach the City Roast level, which is the minimum acceptable roast level for most grinding needs and brewing preferences. It is also known as American roast.
- City Plus Roast – Coffee oils migrate while sugars continue caramelizing due to further chemical reaction from increasing temp. As a result, the beans will start swelling. At this level, you can brew tasty medium roast coffee.
- Full City Roast – The roast character of full city roast is that the beans turn darker and are about to undergo the second cracking.
- Full City Roast (Second Crack) – The beans heat up further to undergo the second cracking, which is more violent than the first cracking. Once this happens, the roast flavors gain more intensity.
- French Roast (Dark Roast) – The beans start releasing a pungent odor. Sugars in the beans burn, but the flavor isn’t ruined. The structure of the beans breaks down. It’s the most extreme roasting level within the limits of good coffee flavor.
- Burn – You should stop roasting by now as the beans are in the verge of burning. Failure to stop roasting will burn the beans and completely change the bean structure. Consequently, the beans may release a terrible smell.
It’s important to point out that some roasting charts include or exclude certain distinctions other than those discussed above. The distinctions included above are the basic levels of a standard roasting process without oversimplifying or including minor distinctions.
Light Roast vs. Dark Roast
Different coffee lovers have different tastes on the kind of coffee roast level they want. However, a broader classification of the above denominations included coffee roasts levels such as light roast, medium roast, medium-dark roast, and finally dark roast. Generally, darker roasts have less caffeine and less mass than lighter roasts. Each roast is ideal for certain brewing methods.
Roasts levels such as Full City Plus and Fully City don’t have major differences since they’re both categorized under dark roasts. On the other hand, you’ll find some differences between French Roast and City Roast.
During the roasting process, the internal temperature of the coffee beans rises. Also, the temperature of the coffee roaster rises as the roasting process continues. As such, different roasts are differentiated by their temperature when being removed from the roaster.
Here’s how hot you’ll roast coffee beans according to the required roast level:
-
Light Roast
You can achieve light roast by heating the beans until they attain a temperature of between 356 to 401 degrees Fahrenheit. Light roasts are also referred to as cinnamon roast, half city roast, or full city roast. Regardless of what you may call them, they’re categorized just before the first cracking sound. When the beans reach this roast level, they’re still dry. Also, they may be a little hard or dense, especially when removed before attaining the initial crack.
Light roast is a great choice for anyone who prefers brighter or higher acidity brews featuring a light body. It’s often safe to roast beans to this level at home since you’ll need a lower roasting temperature and less time.
-
Medium Roast
When roasting beans to the medium roast level, such as City or City Plus, you’ll be targeting a roasting temperature of between 410 to 428 degrees Fahrenheit. At this temperature, the beans have a fairly dry surface. However, they’re easier to distinguish from green beans as coffee changes in color and oiliness when roasting. A medium roast exists between the middle of the initial crack and its end. Some roasting professionals consider medium roast as anything between the initial and second cracking.
Medium roast is more preferred over light roast due to its fuller body and medium acidity. Also, the recommended temperature for attaining medium roast is manageable for roasting at home.
-
Medium-Dark Roast
There’re several distinctions within this roast level. They include Vienna Roast, Full City Plus, and Full City. However, the temperature window is smaller at this roast level. The temperature for this roast level is between 437 to 446 degrees Fahrenheit. Oil patches can be seen on the beans as they approach the second cracking. Thus, listen to the cracks carefully. By now, the flavors and varietal notes become more prominent, thereby creating spicy hits and a fuller, heavier body.
-
Dark Roast
Dark roast includes Espresso Roast, French Roast, and Italian Roast. Dark roasts are roasted at a temperature of about 464 degrees Fahrenheit. The basic rule to get a perfect dark roast is to maintain a temperature of below 482 degrees Fahrenheit. However, roasting at this temperature is quite tricky and dangerous, especially if you don’t have the right roasting equipment. By now, the beans have a very oily surface. They’ll also have low acidity.
Also, dark roasts overshadow origin coffee characters with respect to flavor. Roasting coffee beans beyond this level will result in burnt beans or even cause a fire. Thus, be cautious when roasting up to the dark roast level at home.
Cooling Roasted Beans and Chaff Removal
When roasting coffee beans, they shed outer skins and leave behind a shell. The shell is commonly known as chaff. You’ll need to get rid of the chaff before grinding the beans. To remove it, start by gathering two colanders. Immediately you’re done roasting, put the hot coffee beans into one of the colanders. Next, put the beans into the second colander. Switch them back to the first colander and then back to the second colander. Do this repeatedly to get rid of the chaff.
Don’t worry if you’re unable to remove every single bit of the chaff. A minimal amount of chaff won’t affect the flavor profile of your brew.
Supplies Needed To Roast Coffee Beans At Home
You’ll need the following supplies to roast coffee beans:
- Coffee roaster– There’re several roasters available on the market. You can even roast the beans with a popcorn maker. Popcorn machines are affordable. Besides, a popcorn machine is an easy to use home coffee roaster.
- Green coffee– It might be challenging to get green coffee in some areas since most coffeehouses and roasters only sell roasted beans. Regardless, check with local coffeehouses or roasters for green beans.
- Storage– You’ll need to store roasted beans properly before using them. The best storage is an airtight storage container instead of bags. However, roasted coffee beans will still lose their aroma or flavor after a week, even when stored properly due to oxidation. Thus, only roast the coffee beans you’re sure to consume within a week.
Upon gathering the required supplies, it’s time to start roasting in readiness to brew coffee with success like baristas. Remember that the beans should be roasted to a temperature of between 370 and 540 degrees Fahrenheit for a successful roasting process.
When roasting the beans, ensure they remain constantly agitated throughout the process for consistency. That way, they’ll be roasted uniformly without some of them becoming scorched. It’s worth noting that roasting beans will produce smoke. Thus, roast them in a well-ventilated area for maximum airflow, else your kitchen or home will become very smoky. For instance, you can roast them on a patio or open garage.
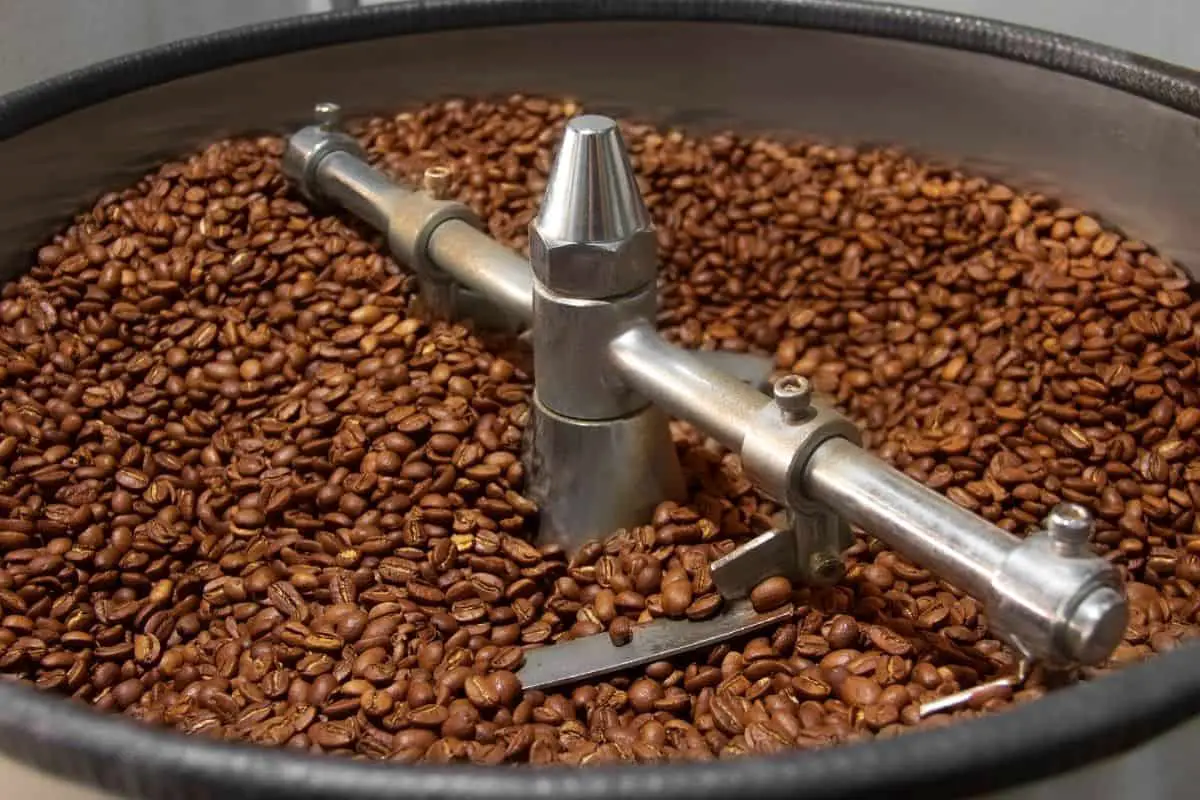
Roasting Coffee Beans with a Roaster
You can easily find a good-quality coffee roaster in the market today. Some coffee roasters operate like popcorn makers. You will use the device like you do with popcorn popping. Preferably, choose popcorn poppers from a manufacturer who offers warranty on their home roasters. Also, choose a model that’s easy to use and safe for your family.
An air popper uses hot, fast-moving air to heat and roast coffee beans. At the same time, the fast-moving air in air roasters keeps the beans agitated throughout the roasting process. Such a roasting method is quite easy since the roaster does much of the work for you. Also, there’s reduced risk of a fire hazard. You definitely don’t want to deal with the problem of starting fires in your house.
Popcorn makers are more ideal than drum roasters for home coffee roasting as they don’t take up a lot of space and are easier to use. For instance, a drum roaster such as the Behmor can roast 1 pound of beans but is slower than air poppers.
You can also try other another home roaster appliance such as microwave roasting or oven roasting. Ovens are also easy to use due to automation and numerous features. Also, an oven roast offers the benefit of a smooth coffee roasting process. You can set the temps and use the timer to set the timing. Also, the heating element distributes heat evenly. However, an oven may consume a lot of power. You can also roast beans on a cast iron skillet.
Supplies needed
- Colander
- Raw coffee beans
- Wooden spoon
- Coffee roaster
Step 1: Put the coffee beans into the roaster
The roasting process will start by visiting a local coffeehouse or roaster to get green beans. You can ask them for professional advice if you’re not sure about what you’re doing. Their roasting experts may have some advice on how to get the best roast from your beans.
Upon gathering the required supplies and choosing the best home roasting method, put the right amount of beans from the coffee bag into the roaster. You can measure the batch size depending on the quantity you need. Measuring scales can help in measuring the beans. Store extra beans in an airtight container. Then close the roaster. You can follow the instruction manual of your roaster to do it right and avoid problems.
Step 2: Start the Machine
Upon closing the roaster, turn it on. Give the beans time to roast up to the desired roast color. However, it’s hard to tell how the process will be like since different roasters operate differently. Refer to the user manual of your roaster to avoid making any mistakes.
Regardless of how your coffee roaster works, it’s important to monitor it carefully for any malfunctions. Remember that roasting the beans for longer durations will make them stronger and darker.
Step 3: Stirring, degassing, and storage
Once the roaster browns your beans to the preferred roast level, remove them from the roaster. Next, cool them to attain room temperature. One of the options to cool them is transferring them between two colanders severally until they gain room temperature. Alternatively, stir them with a dry wooden spoon until they’re cool.
Once cool, leave the beans in an open area for not less than 12 hours. Doing so allows them to degas, whereby they release carbon dioxide. Next, store the roasted beans in a dry, airtight canister. Keep the canister in a cool, dry place and away from direct sunlight.
Roasting Coffee Beans Using a Stovetop Popcorn Maker
Prior to the invention of modern popcorn makers and coffee makers, coffee lovers would roast the beans on a stove. You can still roast them with a stove top popcorn maker. The roaster comes with a handle on the lid for agitating the beans while roasting.
Supplies needed
- Green coffee beans
- Stovetop popcorn maker
- Laser thermometer
- Outdoor burner (electric or gas)
- Airtight container
- Baking sheet
Step 1: Setting up the popcorn maker and preheating
First, buy green unroasted beans from a local coffeehouse or supply store. You can ask for advice about how dark you’ll need to roast the beans. Feel free to do further research and experiment with different roast levels until you get your preferred roast based on your taste preferences.
Upon buying enough beans, clear the table on which you’ll set up the roasting equipment. Next, set up the burner, baking sheet, and popcorn maker. Turn on the stove and preheat the popcorn maker to approximately 400 degrees Fahrenheit. Preferably, check the temperature with a functional laser thermometer. If you don’t have one, preheating the popcorn maker for about 5 to 10 minutes will attain the right temperature range.
Step 2: Add enough coffee beans into the popcorn maker
Once the popcorn maker attains the right temperature, add enough whole beans. Start turning the handle to agitate the beans. Agitating the beans keeps them moving throughout the roasting process for even roasting. Ensure you rotate the handle steadily and evenly. Although doing this may sound laborious, it’s the only way to roast your beans to perfection.
As you rotate the handle, the beans will be roasted by the heat coming from the stove. You’ll see them turn from green beans into fragrant and beautiful pellets full of delicious flavors. Pay special attention to the process since perfectly roasted beans can turn into burnt beans within a few minutes.
Step 3: Roasting the beans
While the beans heat up, they’ll go through several roasting stages as discussed earlier on. You’ll see them transform from whole beans into roasted beans that are ready for grinding and brewing. Also, you’ll need to know the roasting level you want. Thus, observe the roasting process keenly to attain the roast level you want. You’ll eventually master the entire process over the time and avoid burning the beans.
There’re ten roasting levels as previously discussed. Just identify the roast level you want. However, the tenth level should be avoided since it represents the stage at which the beans are over-roasted and burnt.
Step 4: Removing the roasted beans and cooling
Upon attaining the preferred roast, remove the roasted beans from the popcorn maker and put them on a clean, dry baking sheet. Cool the beans by shaking the sheet. You can proceed to store them upon attaining room temperature.
Step 5: Storing the roasted beans
Allow the beans enough time to cool. Store the beans in an airtight container, preferably a mason jar as it’ll maintain a perfect seal. In case you’ve roasted them to Full City Roast or darker than that, allow them about 12 hours to cool and degas before storage.
Once done, you can grind the beans while still fresh and brew coffee using your preferred brewing method. You’ll need about 20 minutes to roast the beans.
Roasting Coffee Beans Using a Hot Air Popcorn Maker
You can easily roast coffee beans with a standard air popcorn maker. Beginners are recommended to try this method as it’s easy to use. With this method, you can experiment with different roast levels. It’ll only take you few minutes to roast the beans to the preferred roast level. While this machine is traditionally used to make popcorns from corn kernels, it’s something that perfectly roasts coffee beans.
Supplies needed
- Green coffee beans
- Hot air popcorn maker
- Bowl
- Baking sheet
- Thermometer
- Airtight container
Step 1: Setting up and preheating the air popcorn maker
Before proceeding, gather all the required supplies as listed above. Check for unroasted beans from your local roaster. You can pick different coffee bean varieties. Ask the roaster how dark you should roast each variety.
Upon gathering the required supplies, set up enough space on your counter. Set the popcorn maker, bowl (to catch chaff), and the baking sheet for cooling the beans after roasting. Turn on the popper. Preheat it for approximately 30 seconds.
Step 2: Add enough coffee beans
Upon preheating the popcorn maker, put enough coffee beans (½ cup) into the vessel. It’ll take you approximately 5 minutes to roast the beans. Ensure you monitor the roasting process. Leaving them unattended may leave you with burnt beans.
Step 3: Roasting the beans
While the beans undergo the roasting process, they’ll go through various stages. You’ll see them transform from raw beans to roasted beans that can be ground and brewed. Decide the roast level you’re planning to attain. Observe the roasting process keenly to attain the preferred roast level. That way, you won’t burn the beans. You’ll eventually learn to roast them perfectly with this method.
Step 4: Removing and cooling the beans
Upon reaching the preferred roast level, turn off the popcorn maker. Pour out the roasted beans on a dry baking sheet. Doing so will allow the beans to cool and attain room temperature quickly. You can shake the sheet continuously to assist in cooling the beans more quickly. Allow the beans to cool completely before storage.
Step 5: Storing the beans
Upon cooling the beans, put them in a dry, airtight container for storage. A tinted OXO container or Mason jar are the best options for storing roasted beans. However, allow the beans about 12 hours to degas before storage, especially if you’re roasting them to a Full City or darker roast.
Once you’re ready to brew coffee, grab some of the stored coffee beans and grind them. Upon mastering the art of roasting whole beans at home, you’ll always appreciate the benefits that come with roasting beans with an air popcorn popper.
Also read How to Roast Coffee Beans in a Whirley Pop?
Roasting Coffee Beans Using an Oven
Another method that you can use to roast green beans at home is using an oven. You probably have an oven at home. However, this method might be quite smoky. Thus, ensure you keep the windows open to allow for sufficient ventilation.
Supplies needed
- Colander
- Cookie sheet or oven tray (perforated option)
- An oven that can reach high temperatures
Step 1: Preheating your oven and preparing the beans
First, preheat the oven until it attains a temperature of around 450 to 500 degrees Fahrenheit. However, the temperature may vary depending on the type of oven and whether it’s electric or gas. Regardless, avoid exceeding this temperature since the beans might burn.
As the oven preheats, spread the beans on a cookie sheet. Avoid stacking the beans over each other to ensure they roast evenly.
Step 2: Baking the beans
It’s now time to start baking your coffee beans. Once the oven attains the preferred temperature, put the raw beans that you’ve already spread on a cookie sheet into the oven. Close the oven door.
In case your oven has a glass window and an inbuilt light, you’ll easily watch the entire action. Pay close attention to the roasting process to avoid burning the beans. Even if your oven doesn’t have a window, you shouldn’t leave it unattended.
Step 3: Take note of the cracking sound
While watching the roasting process, you’ll notice the beans darken with passing time. Besides the changing color, a cracking sound will be another way of alerting you that the beans are roasted properly, especially when dealing with an oven that doesn’t have a window. You’ll notice the sound of the initial cracking noise after some minutes. The initial crack indicates that the beans have attained a light roast.
If you want the beans to continue roasting beyond this point, wait for the second cracking sound after a few extra minutes. The second crack indicates that the beans have attained a medium roast level. If you prefer the beans to roast up to this level, allow them to remain in your oven for about a minute before removing them.
If you’re targeting a darker roast, leave the beans in the oven for a few more minutes. It won’t take long to attain a dark roast after the second crack. Thus, don’t allow the beans to bake for too long to avoid burning them.
Step 4: Cooling the beans
Upon roasting the beans to your preferred roast level, remove the beans from the oven. Put them into a metallic colander. Shake the colander gently to cool the beans until they attain room temperature. Preferably, shake them over a sink or outside since you can’t avoid the chaffy waste. You should wear oven mitts when removing the beans and holding the metallic colander since the beans are still hot.
Step 5: Degassing before storage or brewing
Upon the beans attaining room temperature, leave them in the open for a minimum of 12 hours. Doing so allows them to degas, whereby they release carbon dioxide. When done, proceed to store or grind the beans for brewing.
What You Need To Know Before Roasting
The above-mentioned coffee roasting methods are only a few options. If you’re extremely adventurous, or you’re a grilling fanatic, you can roast the beans on a pan over a grill or campfire. There’re numerous options you can try. Just ensure you have all the needed supplies.
As you can see, roasting coffee beans at home won’t take much of your time. It’s a simple process and gives you the chance to customize coffee tastes. When roasting, experiment with different roast levels and roasting methods until you get a roast that fits your taste preferences.
However, before getting started with a preferred roasting method, there’re certain things you need to know including:
-
Should you wash raw coffee beans prior to roasting?
Never wash raw coffee beans. There’s no reason for washing coffee beans before roasting them. Although you may have concerns over the dust that comes with raw coffee beans after opening their package, roasting the beans exposes them to extreme heat that’ll kill any bacteria on them. Thus, the dust shouldn’t be a concern.
-
How long does roasting coffee beans take?
There’re certain factors that determine the roast time. The main determining factors are the roasting temperature and the roasting technique. A hotter roasting temperature means that you’ll achieve the desired roast level sooner. Different roasting methods take different roasting times.
-
How are flavors added to coffee?
Upon mastering a certain coffee roasting method, you’re probably thinking about how you can add flavor. It’s possible to enhance the taste of your coffee by adding flavor. Essentially, you’ll need to add a flavored oil to freshly roasted beans while still warm.
Toss the oil and beans together to mix them up in a dry colander. Alternatively, stir them thoroughly but gently with a clean and dry wooden spoon. Next, allow them to sit for approximately 15 minutes. That way, the roasted beans will absorb the aroma and taste of the added flavor.
However, the amount of flavor to add depends on the kind of flavor you’re using. Thus, read the label on the flavor package for instructions on the appropriate amount of flavor to add.
-
Is it worth roasting coffee beans at home?
Any coffee enthusiast who loves the taste of fresh coffee will find it worth the effort and time needed to roast coffee beans at home. Since roasted coffee beans have a short shelf life, roasting them soon before brewing coffee will allow you to maximize the flavor profiles and deliciousness that comes with fresh beans.
Brewing with fresh roasts allow for the extraction of maximum flavors. Thus, only roast coffee beans that you can consume within a week as they tend to lose much of their flavor and freshness within a week. Besides, roasting at home will allow you to gain deeper coffee knowledge and become a coffee connoisseur. Take advantage of your taste buds and palate to test different roasts until you find the best one for your preferences. While tasting different roast levels, you’ll learn more about their aromatics and origin character. Don’t forget to buy a grinder to grind the beans at home.
If roasting coffee beans is not your thing, what next? The best option would be joining a reliable coffee subscription service that roasts and ships fresh beans. That way, you’ll be guaranteed of getting freshly roasted beans.
Related Articles