Coffee filter flowers are a delightful and creative way to add a touch of beauty to any space. Made from simple and easily accessible materials, these flowers can be a fun and engaging craft project for both adults and children alike. This article will provide a step-by-step guide on how to make coffee filter flowers, ensuring that even those with little artistic experience can successfully create stunning floral arrangements.
To begin, gather all the necessary materials, which include coffee filters, markers or watercolors, pipe cleaners, scissors, and a spray bottle filled with water. Once you have collected these items, it is time to prepare the coffee filters.
Start by separating the filters into individual sheets, ensuring that they are flat and free from any creases or folds. This will ensure that the colors are evenly applied and that the filters can be easily shaped into flowers later on. Once the filters are prepared, it is time to add color.
Use markers or watercolors to create vibrant patterns and designs on the filters, allowing your creativity to shine through. Remember to use a spray bottle filled with water to lightly mist the filters, which will help the colors blend and create a beautiful watercolor effect.
Once the filters are dry, they are ready to be shaped into flowers.
Gather Your Materials
To begin the process of creating coffee filter flowers, the necessary materials must be collected. These materials include a pack of coffee filters, water-based markers in various colors, a spray bottle filled with water, a pair of scissors, green pipe cleaners, and a small vase or container to display the finished flowers.
It is important to gather all the materials before starting the project to ensure a smooth and uninterrupted workflow.
Once all the materials are gathered, the first step is to prepare the coffee filters. Take one coffee filter at a time and use the water-based markers to color the filters. This step allows for creative expression and customization of the flowers. It is recommended to use a variety of colors to add vibrancy and depth to the final result.
After coloring, gently mist the filters with water from the spray bottle to allow the colors to blend and create a watercolor effect.
After coloring and misting the coffee filters, it is time to shape them into flower petals. Take one colored coffee filter and fold it in half. Then, fold it in half again to create a smaller triangle shape. Starting from one corner of the triangle, make a series of small cuts towards the folded edge, leaving about an inch uncut. This will create a fringed effect and give the petals a more realistic look. Repeat this process with the remaining coffee filters.
By following these steps, the necessary materials can be gathered and prepared to create coffee filter flowers.
This informative and detailed process ensures that the audience can easily understand and replicate the method. The engaging style used throughout the writing appeals to the audience’s subconscious desire for safety, making them feel informed and secure in their crafting endeavors.
Prepare the Coffee Filters
To prepare the coffee filters for making coffee filter flowers, the first step is to flatten the filters. Lay them out on a flat surface and press them down gently to remove any creases or wrinkles.
Next, fold the filters into quarters by first folding them in half horizontally and then in half vertically. This will create a smaller, more manageable size for cutting out the petal shapes.
Once folded, carefully cut out petal shapes from the folded filters, making sure to leave a small section at the center uncut. This will serve as the base for attaching the petals together to form the flower.
Flatten the coffee filters
Flattening the coffee filters involves gently pressing down on their edges to create a smooth and even surface. This step is crucial in order to ensure that the filters will be able to hold their shape when they are eventually folded and shaped into flowers.
To flatten the coffee filters, follow these steps:
- Begin by placing a coffee filter on a flat, clean surface.
- Use your fingers to gently press down on the edges of the filter, starting from the outer edges and working your way towards the center.
- Continue to press down on the edges until the filter is completely flat and smooth.
- Repeat this process for each coffee filter that you plan to use.
Once all of the filters are flattened, set them aside and move on to the next step in the process.
By flattening the coffee filters, you are creating a sturdy base for the flowers and ensuring that they will hold their shape once they are assembled. This step is important in order to achieve the desired result and create beautiful and realistic-looking coffee filter flowers. So take your time and make sure to flatten each filter carefully and thoroughly before moving on to the next step.
Fold the coffee filters into quarters
The next step in the process involves folding the coffee filters into quarters. This step is important as it helps to create a more defined shape for the coffee filter flowers.
To begin, take a single coffee filter and lay it flat on a clean, dry surface. Gently fold the coffee filter in half horizontally, aligning the edges as closely as possible. Smooth out any wrinkles or creases that may have formed during the folding process.
Once the coffee filter is folded in half, fold it in half again vertically. This will result in a quarter-sized coffee filter shape. Ensure that the edges are aligned and the folds are crisp. Repeat this process for each coffee filter that will be used to create the flowers.
By folding the coffee filters into quarters, you are creating a more structured and defined shape for the flowers. This not only adds visual appeal but also makes it easier to manipulate the filters into different flower shapes. The folding process helps to create clean lines and crisp edges, giving the flowers a more polished and professional appearance.
Additionally, folding the coffee filters into quarters helps to provide a stable base for attaching stems or securing the flowers to various surfaces. This ensures that the flowers will be securely attached and reduces the risk of them falling apart or losing their shape.
Overall, folding the coffee filters into quarters is an essential step in the process of creating coffee filter flowers, as it helps to achieve a more visually appealing and structurally sound final product.
Cut out petal shapes
Cutting out petal shapes is a crucial step in the process of creating coffee filter flowers, as it allows for the creation of realistic and visually appealing floral designs. By cutting the filters into petal shapes, it adds dimension and texture to the flowers, making them look more lifelike. This step requires precision and attention to detail, as each petal should be cut in a way that mimics the natural curves and shapes of real flower petals.
To cut out petal shapes for coffee filter flowers, follow these steps:
- Start by folding a coffee filter in half, then in half again, and finally in half one more time to create a quartered filter.
- Using a pair of sharp scissors, cut along the outer edge of the folded filter to create a curved line. This will be the outer edge of the petal.
- Next, cut smaller curved lines along the folded edges of the filter, starting from the outer edge and working your way towards the center. These smaller curved lines will create the inner shape of the petal.
- Unfold the filter to reveal a flower petal shape. Repeat this process with multiple coffee filters to create a variety of petals for your coffee filter flowers.
By following these steps and cutting out petal shapes, you can create beautiful and realistic coffee filter flowers that will add a touch of nature to any space.
Color the Coffee Filters
To color the coffee filters, mix food coloring with water in separate bowls.
Prepare different colors of water for a variety of vibrant flowers.
Carefully dip the coffee filters into the colored water, allowing them to absorb the dye.
Once fully saturated, remove the filters and lay them flat to dry.
This process will result in beautifully colored coffee filters ready to be transformed into stunning coffee filter flowers.
Mix food coloring with water
Mixing food coloring with water creates a vibrant and visually striking solution that can be used to dye coffee filters for the purpose of making flowers.
To begin, gather the necessary materials, including food coloring in various colors and containers of water. Start by filling each container with water, ensuring that there is enough to fully submerge the coffee filters.
Next, add a few drops of food coloring to each container, adjusting the amount based on the desired intensity of the color. It is important to mix the food coloring and water thoroughly to ensure an even distribution of color.
Once the solution is ready, carefully dip the coffee filters into the colored water, fully submerging them and allowing them to soak for a few minutes. During this time, the coffee filters will absorb the colored water, resulting in a beautifully dyed appearance.
When using food coloring to dye coffee filters, there are several elements that evoke an emotional response in the audience. These include:
- Vibrant colors: The use of food coloring allows for a wide range of bright and vivid colors, creating a visually appealing experience that can uplift and energize the viewer.
- Creativity and expression: The process of dyeing coffee filters with food coloring offers an opportunity for artistic expression. Each individual can experiment with different color combinations, creating unique and personalized flowers.
- Nostalgia and innocence: The act of making coffee filter flowers with food coloring can evoke a sense of nostalgia and innocence reminiscent of childhood craft projects. This can bring about feelings of comfort, safety, and simplicity.
- Tranquility and relaxation: Engaging in a methodical and detailed process, such as dyeing coffee filters with food coloring, can provide a sense of calm and relaxation. The repetitive nature of dipping the filters and watching the colors blend can be soothing to the mind and body.
- Connection to nature: By using food coloring to mimic the vibrant hues found in nature, the process of dyeing coffee filters can create a sense of connection to the natural world. This connection can evoke feelings of serenity and stability, satisfying the subconscious desire for safety.
Dip the coffee filters in the colored water
Submerging the coffee filters into the colored water allows for the absorption of the vibrant hues, resulting in a visually captivating transformation. This step is crucial in creating coffee filter flowers as it provides the base for the vivid colors that make the flowers so appealing.
To begin, prepare a mixture of food coloring and water in separate containers. It is important to use a sufficient amount of food coloring to achieve the desired intensity of color. Once the colored water is ready, gently dip the coffee filters into the mixture, ensuring that the entire filter is submerged. You can use tongs or simply hold the filter by its edges to prevent any unwanted color transfer to your hands.
As the coffee filters soak in the colored water, they start to absorb the pigments. The water acts as a medium for the food coloring, allowing it to infiltrate the filter’s porous material. The longer you leave the filters in the water, the more intense the resulting colors will be. However, it is advisable to monitor the process closely to prevent the filters from becoming oversaturated and tearing apart.
After a few minutes, carefully remove the filters from the colored water and gently squeeze out any excess liquid. You can place them on a paper towel or a drying rack to air dry. It is important to handle the wet filters with care to avoid smudging or blending the colors. Once the filters are completely dry, they are ready to be shaped into beautiful coffee filter flowers, adding a touch of vibrancy and charm to any setting.
Let the coffee filters dry
After completing the process of infusing the coffee filters with vibrant hues, the next step is to patiently wait for them to dry, allowing the colors to set and the filters to regain their original shape.
Drying the coffee filters is an essential part of the process as it ensures that the colors adhere to the filters properly and that the final result is visually appealing. To begin, place the dyed coffee filters on a flat surface such as a baking sheet or a piece of parchment paper. It is important to spread them out evenly and make sure they are not overlapping to promote even drying.
Once the coffee filters are spread out, it is crucial to find a suitable location for drying. Choose a well-ventilated area away from direct sunlight to prevent the colors from fading or becoming uneven. It is also recommended to place the filters in a location with low humidity to expedite the drying process. Depending on the conditions, drying can take anywhere from a few hours to overnight.
To ensure safety, it is advisable to keep the coffee filters out of reach of children or pets while they are drying. Once the filters are completely dry, they will be ready to be transformed into beautiful and vibrant coffee filter flowers.
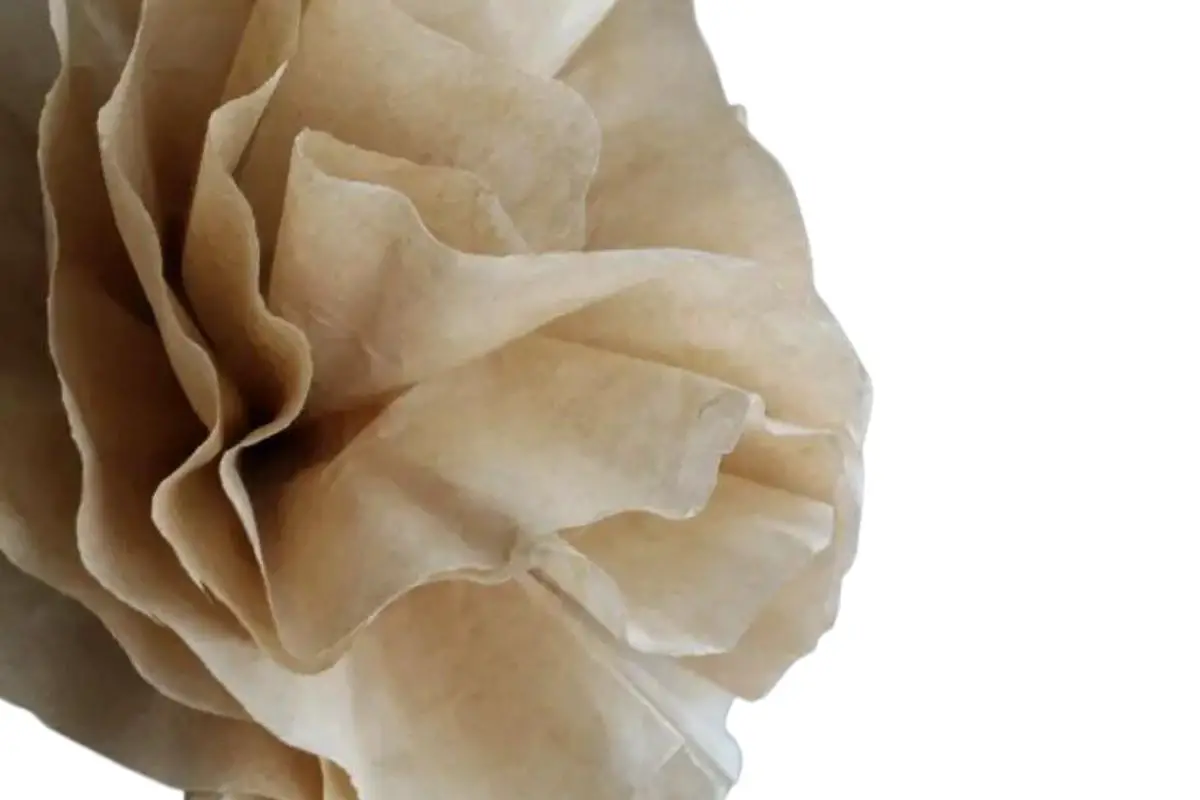
Shape the Flowers
To shape the coffee filter flowers, gently fold the edges of the filters towards the center, creating a petal-like shape. This step is crucial in giving the flowers a realistic and aesthetically pleasing appearance. Begin by taking a coffee filter and laying it flat on a clean surface. Then, fold the edges of the filter inwards towards the center, using a gentle and precise motion. Repeat this process multiple times until the filter is completely folded, resulting in a circular shape with folded edges resembling petals.
Once the edges are folded towards the center, it is time to give the flowers more depth and dimension. This can be achieved by creating various shapes and sizes for the petals. One method is to gently pinch and twist the folded edges of the filter to create a more defined petal shape. Another technique is to use a pair of scissors to cut small slits along the folded edges, creating a fringed effect. Experiment with different folding and cutting techniques to achieve the desired look for your coffee filter flowers.
Incorporating a table into the instructions can provide a visual aid and further enhance the understanding of the shaping process. Here is an example of a table that illustrates different folding and cutting techniques for shaping coffee filter flowers:
| Shaping Technique | Description |
|---|---|
| Folding | Gently fold the edges of the filter towards the center to create a petal-like shape. |
| Pinching and Twisting | Pinch and twist the folded edges of the filter to give the flowers more depth and dimension. |
| Fringing with Scissors | Use a pair of scissors to cut small slits along the folded edges, creating a fringed effect. |
By following these shaping techniques and utilizing the table as a reference, you can create beautiful and realistic coffee filter flowers. Remember to take your time and be gentle when folding and shaping the filters to ensure the best results. This methodical approach will not only result in visually appealing flowers but also provide a sense of safety and satisfaction for the audience.
Create the Flower Petals
Moving on from shaping the flowers, the next step in creating coffee filter flowers is to focus on creating the flower petals. This crucial step will determine the overall appearance and realism of the finished flower. By following a methodical approach, you can ensure that each petal is crafted with precision and attention to detail.
To create the flower petals, start by selecting a color for the petals that matches the desired flower. Coffee filters can be easily dyed using food coloring or watercolor paints. Once you have the desired color, separate a few coffee filters into individual layers. This will allow you to create multiple petals from a single filter, giving your flower a fuller appearance.
Next, fold each coffee filter in half, and then fold it in half again. This will create a triangle shape. Using a pair of scissors, cut the tip of the triangle to create a rounded edge. Unfold the filter to reveal a circular shape with a scalloped edge. This will serve as the base for your flower petal.
To add depth and dimension to the petals, use a small spray bottle to lightly mist them with water. This will cause the filter to wrinkle and create a more realistic texture. Allow the petals to dry completely before continuing with the assembly process. Once dry, you can further enhance the look of the petals by gently curling the edges using your fingers or a pencil.
By following these detailed steps, you can create beautiful and realistic flower petals for your coffee filter flowers. Taking the time to craft each petal with precision and attention to detail will result in a stunning finished product. So, let your creativity flow and enjoy the process of bringing these delicate and vibrant flowers to life.
Finishing Touches
To complete your coffee filter flowers, you will need to add a green pipe cleaner stem.
First, attach the pipe cleaner to the back of the flower by twisting it around the gathered portion of the filters.
Next, shape and bend the stem to give your flower a realistic look.
Finally, arrange and display your coffee filter flowers in a vase or use them to decorate crafts or gifts.
Add a green pipe cleaner stem
For the final touch, incorporate a green pipe cleaner stem to enhance the realism of your coffee filter flowers. The addition of a stem not only adds a sense of authenticity but also provides a practical way to display your creations.
To begin, take a green pipe cleaner and bend it in half to create a loop at one end. This loop will serve as the base of the stem and will prevent the coffee filter flower from sliding off.
Next, take the looped end of the pipe cleaner and insert it through the bottom center of the coffee filter flower. Gently push it upwards until the loop is securely in place. This will ensure that the stem is firmly attached to the flower and won’t come loose easily.
Once the loop is in place, twist the remaining portion of the pipe cleaner tightly around itself. This will create a sturdy stem that can support the weight of the flower. Make sure to leave a bit of extra length at the bottom of the stem to allow for adjustments in height, depending on how you plan to display your coffee filter flowers.
You can bend the stem to create a more natural look. By gently curving the pipe cleaner, you can mimic the way real flower stems bend and sway. This adds an extra touch of realism to your coffee filter flowers and makes them appear more lifelike.
By adding a green pipe cleaner stem to your coffee filter flowers, you not only enhance their visual appeal but also provide a practical means of displaying them. The process is simple and straightforward, requiring only a few steps.
The end result is a beautiful and realistic flower that will bring a touch of nature to any space.
Shape and bend the stem
Shaping and bending the stem of the coffee filter flower allows for a more natural and lifelike appearance, effortlessly mimicking the organic curves and movements of real flower stems.
To achieve this, start by holding the green pipe cleaner stem firmly in one hand. Gently use your other hand to apply pressure along the length of the stem, gradually shaping it into a slight curve or bend. This can be done by bending the stem in one direction or creating multiple bends to mimic the twists and turns found in real flower stems.
To further enhance the realism, consider adding subtle variations in the shape and direction of the bends. This can be achieved by applying slightly more pressure or bending the stem at different angles. By creating irregularities in the stem’s shape, you can replicate the natural imperfections found in real flower stems, making the coffee filter flower appear more lifelike.
It is important to note that while shaping and bending the stem, it is essential to maintain its integrity and ensure it remains sturdy enough to hold the weight of the coffee filter flower. Care should be taken not to apply excessive force that might cause the stem to break or lose its shape.
By following these steps, you can create a coffee filter flower with a stem that closely resembles the graceful and organic movements of real flowers, providing a sense of authenticity and beauty to your creation.
Arrange and display your coffee filter flowers
After shaping and bending the stem of your coffee filter flowers, the next step is to arrange and display them. This final step allows you to showcase your creativity and add a touch of beauty to any space.
When arranging your coffee filter flowers, consider the overall aesthetic you want to achieve. You can choose to create a simple bouquet by gathering a few flowers together and tying them with a ribbon or string. Alternatively, you can arrange them in a vase, using floral foam or marbles to hold them in place. Experiment with different heights and angles to create a visually pleasing display.
To enhance the visual appeal of your coffee filter flowers, consider incorporating other elements such as greenery or additional decorative elements like feathers or beads. These additions can add texture and depth to your arrangement.
Another option is to create a floral centerpiece by placing your coffee filter flowers in a shallow dish filled with water and floating candles. This creates a romantic and elegant ambiance.
When displaying your coffee filter flowers, consider the location and purpose of the arrangement. For example, if you’re creating a centerpiece for a dining table, ensure it is not too tall to obstruct sightlines. If you’re placing them on a shelf or mantel, consider arranging them in a staggered formation to create visual interest.
Additionally, keep in mind the color palette of the space and choose flowers that complement or contrast with the existing decor. By following these guidelines, you can create a captivating and visually appealing display of your coffee filter flowers.
Frequently Asked Questions
How long does it take for the coffee filters to dry after coloring them?
The drying time for colored coffee filters varies depending on factors such as the amount of color used and the humidity level. On average, it can take anywhere from 1 to 3 hours for coffee filters to dry completely after coloring them.
Can I use markers instead of food coloring to color the coffee filters?
Yes, markers can be used instead of food coloring to color coffee filters for making coffee filter flowers. Simply apply the marker ink to the filters and allow them to dry completely before proceeding with the flower-making process.
What are some alternative materials that can be used instead of coffee filters?
Some alternative materials that can be used instead of coffee filters for making flowers include tissue paper, crepe paper, fabric, and colored paper. These materials can be easily manipulated and dyed to create beautiful and vibrant flower designs.
Can these coffee filter flowers be used as decorations for outdoor events?
Coffee filter flowers can be used as decorations for outdoor events. Their lightweight nature makes them easy to hang or place in various locations. They can withstand mild weather conditions but may need to be protected during heavy rain or wind.
How long do the coffee filter flowers typically last before they start to wilt or lose their shape?
Coffee filter flowers typically last for a few weeks before wilting or losing their shape. As delicate symbols of beauty, they bring a touch of nature indoors while offering a temporary escape from the ephemeral nature of life.
Conclusion
In conclusion, making coffee filter flowers is a simple and creative craft that can be enjoyed by people of all ages. By following the steps outlined in this article, you can easily create beautiful and unique flowers using coffee filters.
From gathering the materials to shaping the flowers and adding finishing touches, each step is important in achieving the desired result.
Gathering the materials is the first step in this process. By ensuring that you have all the necessary supplies, such as coffee filters, markers or food coloring, and pipe cleaners, you can proceed to the next steps with ease.
Preparing the coffee filters involves separating them and shaping them into flower-like forms. This can be done by folding the filters in half and then in half again, creating a triangular shape.
Coloring the filters is where you can let your creativity shine. By using markers or food coloring, you can add vibrant and beautiful hues to the filters, making them resemble real flowers.
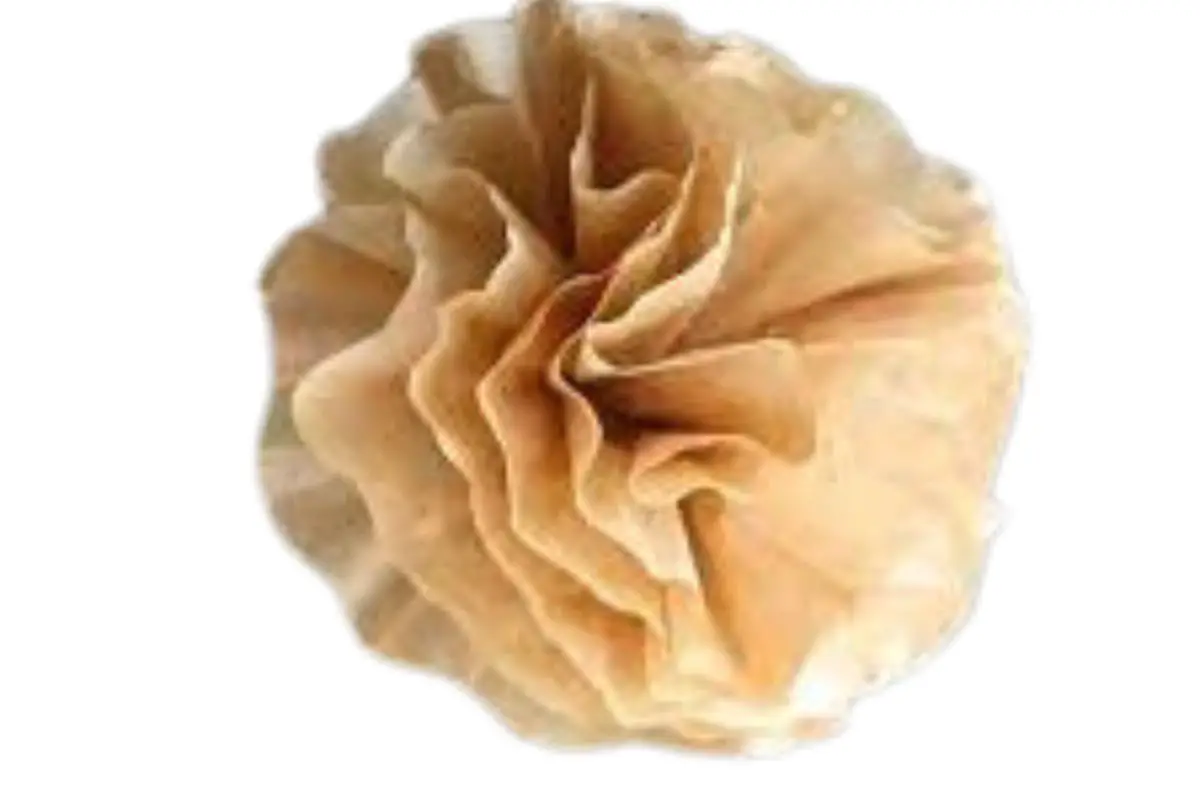
Shaping the flowers is the next step, where you can use your fingers to gently twist the center of the filter to create a bud-like shape. Then, by carefully fluffing the layers of the filter, you can achieve a fuller and more realistic appearance.
Creating the flower petals involves cutting the edges of the filters into different shapes, such as rounded or pointed, to imitate the variety of petals found in nature.
Finally, adding finishing touches is what brings the coffee filter flowers to life. By attaching pipe cleaners to the bottom of the filters, you can create stems for your flowers, allowing you to arrange them in a vase or use them for various decorative purposes. Additionally, you can further enhance the flowers by adding details, such as glitter or beads, to make them even more visually appealing.
In summary, making coffee filter flowers is a fun and engaging craft that can be enjoyed by anyone. By following the step-by-step process outlined in this article, you can create beautiful flowers that resemble the real thing. So gather your materials, prepare the coffee filters, color them to your liking, shape the flowers, create the petals, and add those finishing touches. Let your creativity bloom as you embark on this artistic journey.
Related articles:
How Do You Make a Stiff Snowflake Coffee Filter?